Using DreamFactory's Remote HTTP and SOAP Connectors
Although the DreamFactory Platform is best known for the ability to generate REST APIs, many also take advantage of the platform’s Remote Service connectors.
Proxying a Remote HTTP API
The HTTP Service connector is used to proxy third-party HTTP APIs through DreamFactory. This opens up a whole new world of possibilities in terms of creating sophisticated API-driven applications, because once mounted you can create powerful workflows involving multiple APIs. Once example we like to show off is DreamFactory’s ability to retrieve records from a MySQL database and then translate some of the returned text into a different language using IBM Watson’s language translation API. You could also easily mount any of the thousands of APIs found in the Rakuten RapidAPI Marketplace.
In this section you’ll learn how to add the third-party OpenWeather API to your DreamFactory instance. If you’d like to follow along with this example, head over to https://openweathermap.org/ and create a free account in order to obtain an API key.
Configuring the HTTP Service Connector
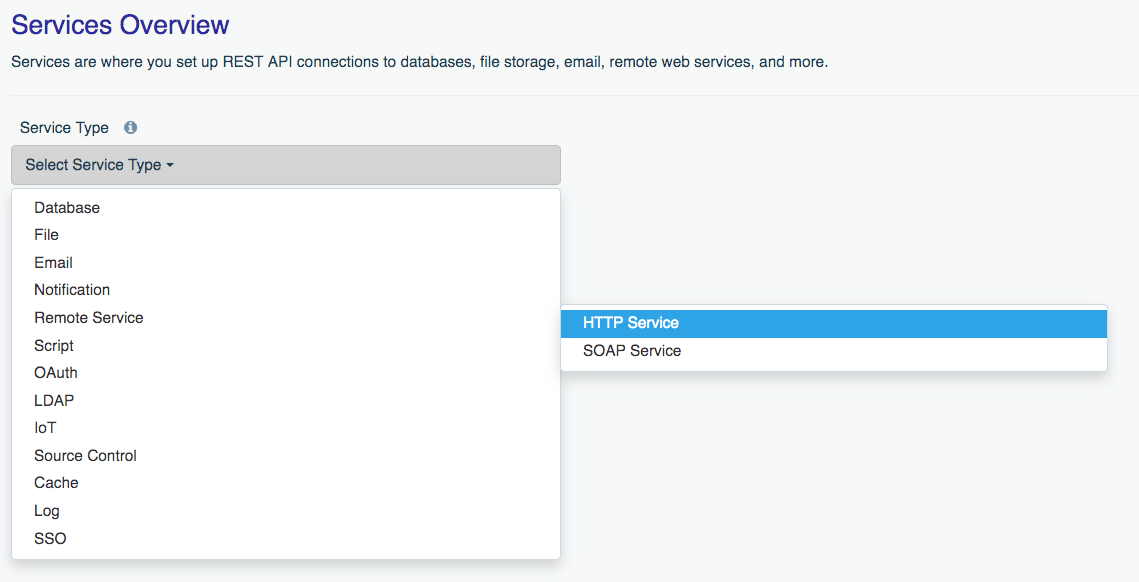
Connecting a remote HTTP API to DreamFactory is easily accomplished in a few short steps. As with all DreamFactory services, you’ll begin by logging into your DreamFactory instance, selecting the Services tab, and clicking the Create link located in the left-hand menubar. From there you’ll choose the HTTP Service connector located within the Remote Service category:

Next you’ll assign a name, label, and description. Recall from earlier chapters that the name will play a role as a namespace for the generated API URI structure, therefore you’ll need to use alphanumeric characters only. I’ll use the name openweather for purposes of this tutorial. The label and description are used as referential information and can be assigned anything you please.
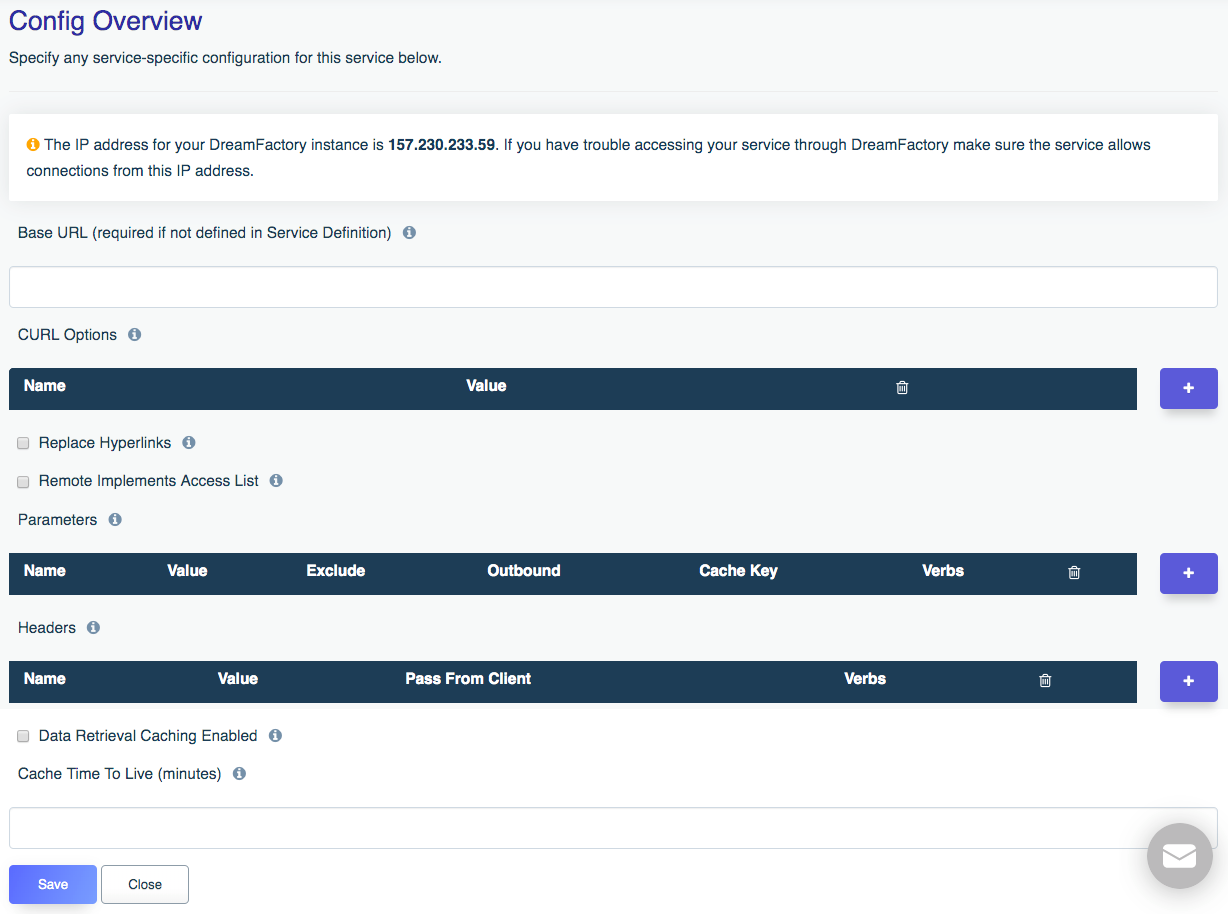
Next, click on the Config tab. It’s here where you’ll tell DreamFactory how to connect to the remote service:

The easiest solution involves pasting in the remote API’s base URL. According to the current OpenWeather API documentation you’ll use the URL https://api.openweathermap.org/data/2.5/weather as the base URL.
Next scroll down to the Parameters section and click the plus sign located on the right-side of the section:

Return to the OpenWeather website and login to your account you’ll find your API key under the section API keys. This API key is passed in as a parameter, meaning you’ll need to add it to the Parameters section like so:

The parameter name is APPID, and the (grayed out) value is found in the Value field. The parameter is declared as Outbound because we’re going to pass it on to the destination API. This is in contrast to the Exclude option which will prevent a particular parameter passed from the client from being passed on to the destination. You can also optionally cache the key for performance reasons by selecting the Cache Key option. Finally, we’ve declared the verbs for which this parameter is enabled. In this case the only verb declaration is GET because we’re going to issue GET requests in order to retrieve weather data.
After adding the base URL and APPID parameter, save your changes by pressing the Save button.
Calling the API
With the service in place, let’s open up an HTTP testing tool such as Insomnia or Postman to test it out. As with all DreamFactory APIs, you’ll first need to create a role and API key. If you don’t already know how to do this follow these links and then return here to continue with the example.
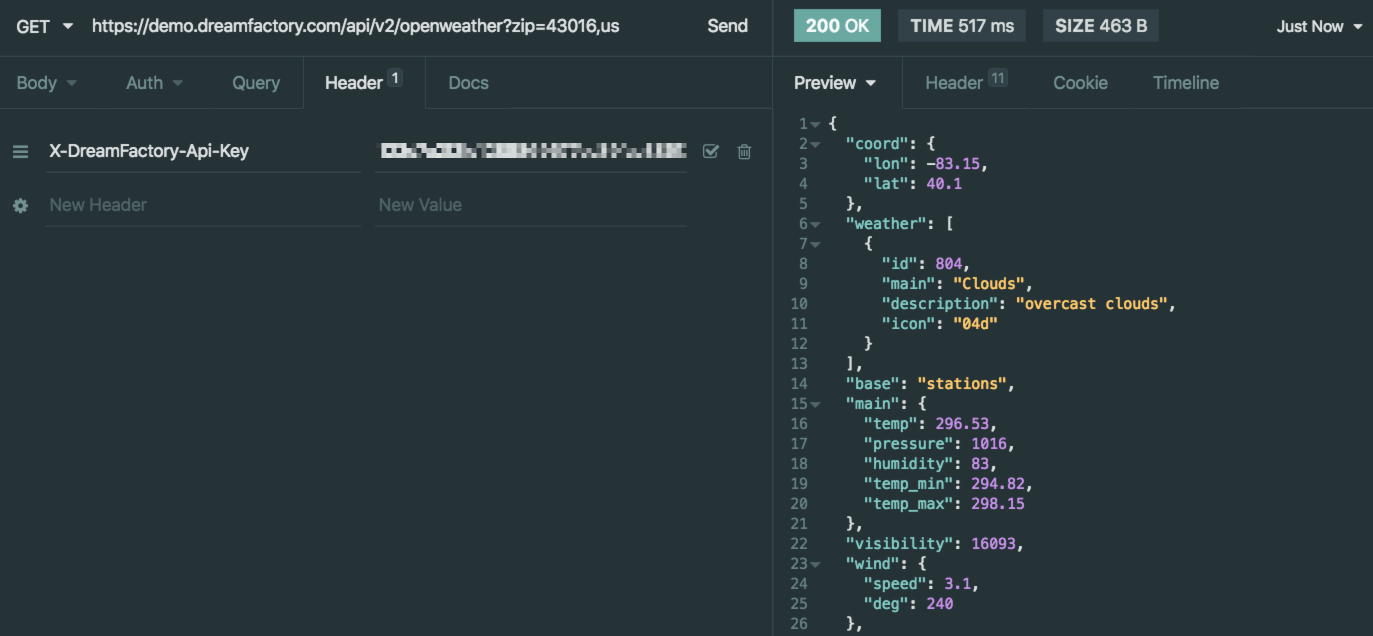
To call your service you’ll create a GET request pointing to https://YOUR_DREAMFACTORY_DOMAIN/api/v2/openweather, passing along parameters associated with the desired geographical destination. You can find a list of supported parameters in the OpenWeather API documentation. Note we’re also passing along the X-DreamFactory-Api-Key header. This API key was created when following along with the previously mentioned instructions found elsewhere in the guide.
In the following screenshot queries for weather assocated with the United States zip code 43016:

Because this request is being forwarded from DreamFactory to the OpenWeather API, the outbound request will look like this:
https://api.openweathermap.org/data/2.5/weather?APPID={YOUR_APP_ID}&zip=43016,us
Adding Headers
Admittedly, OpenWeather API’s practice of requiring the API key be passed along as a parameter is a bit odd, because even when using HTTPS these parameters can be intercepted by a third-party and additionally can be logged to a web server log file. Instead, it’s typical practice that authorization keys be passed along via a header. Headers are preferable because they are encrypted when HTTPS is used.
To add a header, click the plus sign located on the right-side of the Headers section:

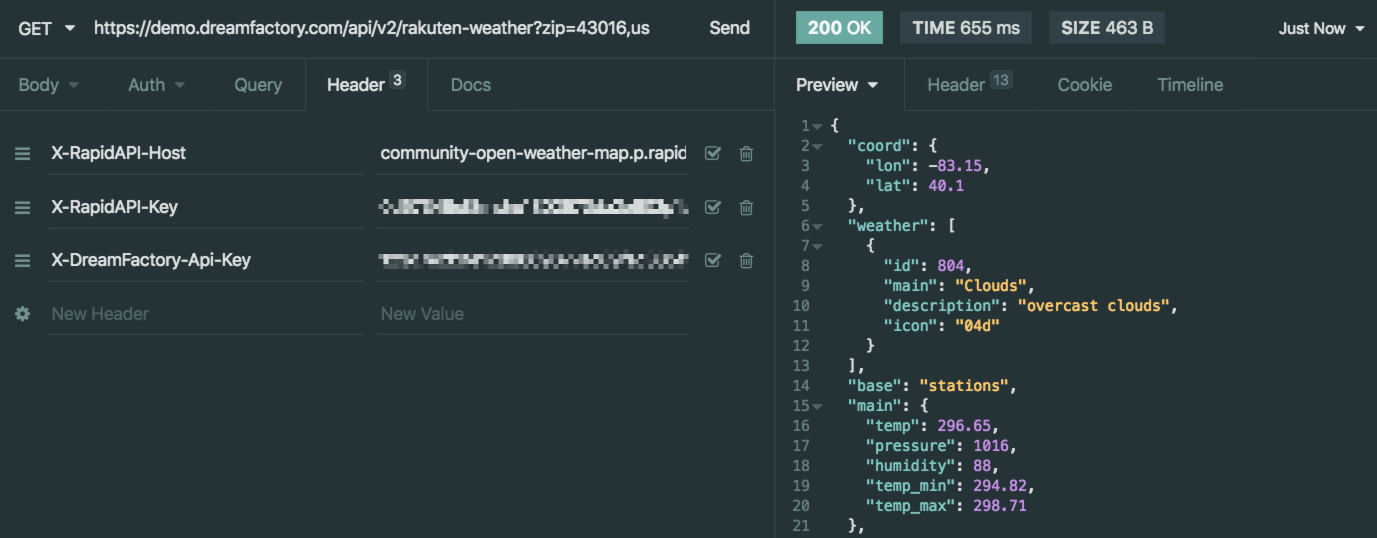
The input fields are similar to those found in the Parameters header, with one notable difference. You can choose the Pass From Client option to pass headers from the requesting client. This is useful if your clients are working with a third-party service by way of your DreamFactory instance, and need to pass along their own custom headers. For instance, the following screenshot demonstrates passing along required Rakuten RapidAPI headers X-RapidAPI-Host and X-RapidAPI-Key from the client to DreamFactory:

This is how the headers were configured inside DreamFactory to achieve this:

Adding a Service Definition
Section forthcoming.
Converting SOAP to REST
Video-based Learning
If video-based learning is more your style, check out the ~12 minute Youtube video we created which walks you through the configuration and access process:
Feedback
Was this page helpful?
Glad to hear it! Please tell us how we can improve.
Sorry to hear that. Please tell us how we can improve.